For years, I dreamed of having a space that perfectly blends fashion and function—a true headquarters for Everyday Is Darling where I can create content, style outfits, and stay organized. When we looked at our home’s layout, we realized our second garage had the potential to be transformed into something incredible: a cloffice (closet + office).
This renovation was no small feat, but the end result? A luxurious, highly functional workspace where I can store my wardrobe, film content, and run my brand efficiently. From electrical work and built-ins to lighting and décor, here’s a behind-the-scenes look at how we turned a basic garage into my dream cloffice.
Click here to watch a reel of the entire process!
The Vision: Turning a Garage into a Cloffice
Between filming content, storing all things fashion and beauty, and needing a space that wasn’t overflowing into my living room, a cloffice just made sense. I wanted a stylish, functional HQ where I could run Everyday Is Darling without feeling like my work was taking over the house (or competing with toys and snack time)…


Plus, as my brand grew and I looked forward to a future full-time assistant—having a dedicated workspace for all things EDID was a must. A little over a year later—you can find my assistant and I working in the cloffice daily. This space isn’t just a closet or an office—it’s the ultimate glam headquarters where creativity meets organization!
The goals for the space: organization, aesthetics, and functionality
When dreaming up my cloffice, I knew I wanted it to feel girly, glamorous, and effortlessly chic—a space that inspires creativity while keeping everything organized and beautiful. My mood board was a dreamy mix of soft glam elements, featuring a palette of light pinks, warm neutrals, and pops of leopard print (because a little wild touch is always a good idea). Gold accents were a must to add that elevated, luxe feel, from hardware to lighting fixtures. I envisioned plush textures, statement mirrors, and the perfect balance of functionality and fabulousness.
This was my mood board:

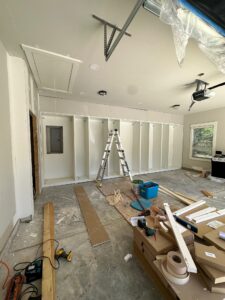
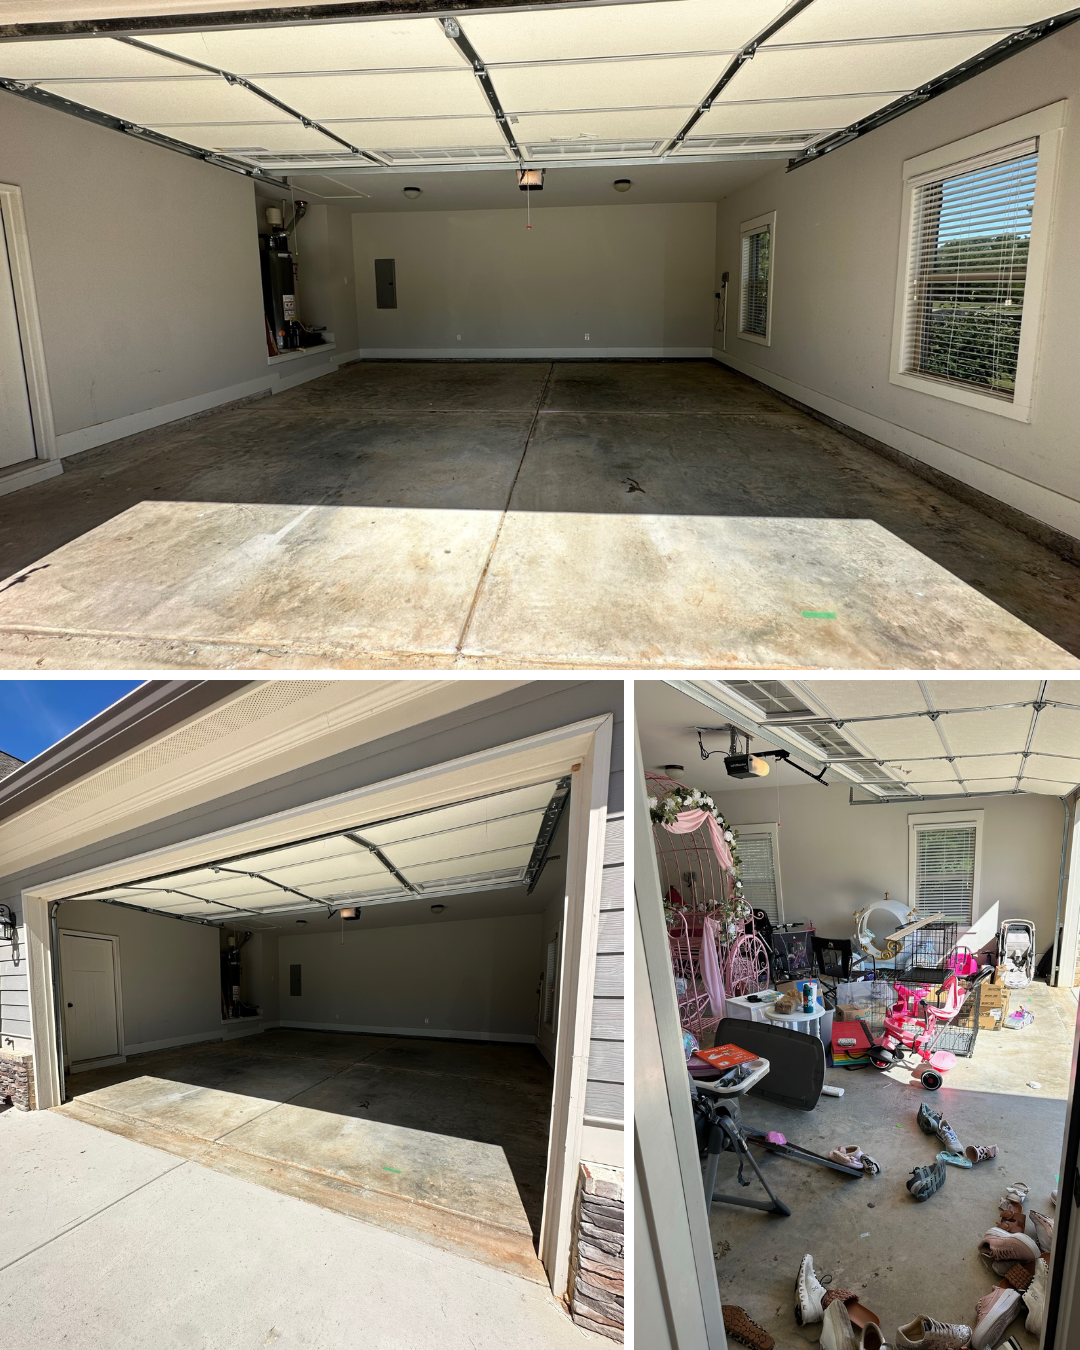
The Before: Cluttered Chaos
Obviously, the first step was to clear out all the space, aka the unofficial dumping ground for random boxes, broken holiday decor, and things I might need someday.

After a dramatic clean-out (RIP to the mystery bins I never opened), I was left with a blank slate and a big vision: turn this once chaotic corner of the house into my dream cloffice. Step one: reclaim the space. Step two: pretend I know how to use a power drill. Let the transformation begin!


The Logistics: Closing in the Space
To transform the garage into my cloffice, we had to get creative with enclosing the space while keeping resale value in mind. Instead of completely removing the garage door, we bolted it shut and took it off its tracks, then added insulation and drywall behind it to create a fully finished interior wall. From the outside, it still looks like a garage, but inside, it’s a gorgeous, functional room!


We also enclosed the area where the hot water heater is, turning it into a closet with a louvered door for ventilation—keeping things practical while maintaining the polished look of the space.


Since we plan to be in this home for a long time but don’t consider it our forever home, we wanted to keep the option open for future buyers. In theory, someone could remove the wall, reattach the garage door to a track, and have a really nice garage again.
HVAC & Electrical: Making the Cloffice Functional
To make the cloffice as functional as it is fabulous, we made sure the HVAC and electrical were top-notch. Instead of reworking our home’s existing system, we installed a mini-split unit, giving the space its own dedicated heating and air. This meant no airflow issues and no need to extend our home’s ductwork—just efficient climate control tailored to this space.

When it came to electrical, I had one rule: you can never have too many outlets! I made sure to add them everywhere—multiple on each wall—so there’s always a convenient spot to plug in my filming equipment, chargers, and beauty tools. The last thing I wanted was to be limited by outlet placement in a space designed for both work and content creation.
Lighting: Setting the Mood with the Perfect Glow
Lighting was one of the most important design elements of this space. I needed it to be bright and functional for filming, but also warm and inviting to match the soft glam aesthetic.
To create even illumination throughout the room, I had can lights installed across the ceiling—no dark corners here! These provide a clean, well-lit environment that makes getting dressed, organizing, and working so much easier.

For a touch of glam and personality, I added a statement chandelier in the center of the room. I knew I wanted a glamorous gold chandelier that wouldn’t break the bank, and after lots of searching, I found the perfect one on Amazon—the right size, the right vibe, and budget-friendly. The only issue was the finish was a little too brassy and shiny for the soft gold aesthetic I was going for. But nothing a little spray paint couldn’t fix! After a quick DIY refresh, it blended seamlessly into the space and became the perfect elegant focal point.


Chandelier — Spray Paint
At the vanity, I needed flattering lighting for makeup and filming. Instead of traditional vanity bulbs, I had sconces mounted directly onto the mirror, which not only looks incredibly custom but also provides that soft, even glow perfect for getting ready.


Sconces
Finally, I made sure to light up the wardrobe wall. Each shelving section has its own built-in lighting, adding that high-end boutique feel. It highlights my favorite pieces and makes the entire closet look ultra-luxe.
The result was a beautifully lit space from every angle, making it as functional as it is stunning!
The Paint & Trim: A Journey to the Perfect Soft Glam Look
Choosing the perfect paint color was way harder than I expected. I knew I wanted a white with a soft pink undertone, but finding the one was a process. I first tried Sherwin Williams Intimate White, but it pulled a little too pink and too warm. I then tested it at 80% strength, but it still wasn’t quite right. Next, I tried Sherwin Williams Natural Linen at 80%, but that leaned too brown. At this point, I was stressing over paint (why is picking the right shade so hard?!).


Finally, I landed on Sherwin Williams Gorgeous White, and it was PERFECT—just the right balance of warmth with a subtle hint of blush. For contrast, I chose a bright white for the trim to keep everything crisp and polished.


Speaking of trim, I originally dreamed of dramatic, ornate molding throughout—think elaborate crown molding and picture frame trim. Like this:

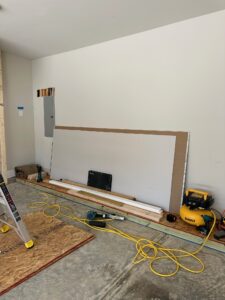
But after seeing the price tag (yikes), I had to get creative. I opted for picture frame molding on one large blank wall as a statement accent.


For the crown molding, I mimicked the look of thicker, more intricate molding by installing standard crown molding, leaving a few inches of space, and then adding a smaller trim piece below. We painted it all one solid color, creating the illusion of chunky, high-end molding without the cost!

To finish it all off, I also re-trimmed the existing entrance door and the new utility closet door, so everything feels cohesive and elevated.
Flooring: The Perfect Foundation
Just as challenging as selecting the paint color was choosing the flooring. I knew I wanted a light wood tone—something that wasn’t too grey but also not too warm. After a lot of searching, I decided on Mohawk RevWood Plus in Hartwick Beigewood Maple. Mohawk RevWood is a premium, waterproof laminate wood flooring that combines the beauty of hardwood with durability that can handle everyday wear and tear. The Beigewood Maple shade was exactly what I was looking for—light, airy, and sophisticated, without leaning too cool or too warm. It balances beautifully with the rest of the design and provides the perfect foundation for the space.

The Wardrobe Wall: A Luxe Built-In Look for Less
From the start, I knew I wanted a closet system that spanned the entire wall—something that felt truly built-in and high-end. But when I got a quote for a custom-built system, my jaw dropped. Let’s just say it was way too many thousands of dollars for my liking.
So, I found a hack for high-end storage on a budget: IKEA. With a little creativity, I was able to customize an IKEA PAX system and trim it out to give it that seamless, built-in look. Since this wardrobe wall is a major focal point in the room, I wanted to be sure it felt polished and custom-made.
The online closet planner was an absolute game-changer! I could input my exact wall dimensions, experiment with different configurations, and customize every single detail before ever stepping foot in the store.

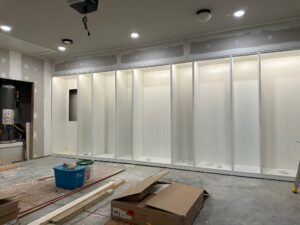
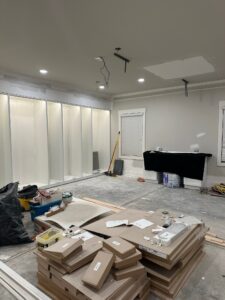
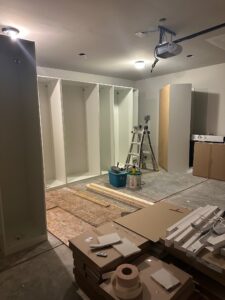
While I was perfecting my layout, my contractor got to work building a base for the wardrobe to sit on—this was the first step in framing it out for that floor-to-ceiling, wall-to-wall custom look.

When I finally visited IKEA in person, I sat down at one of their design stations to finalize my layout after seeing all the pieces up close. I had the basic structure figured out, but I spent some extra time tweaking the shelves, drawers, and organization details to get it just right. This was the moment I could really see my dream wardrobe coming to life, and I was beyond excited!


One surprise? I had no idea IKEA offered integrated lighting for each shelf section—so naturally, I had to add it! I placed one light in every shelving unit to create that soft, luxury glow (because lighting is everything!).
Once the wardrobe frames were assembled (minus the internal shelves), we secured them to the base, drywalled above them to the ceiling, and finished everything off with the same trim used throughout the rest of the room. I was able to achieve a dreamy, high-end wardrobe wall that looks completely custom—without the insane price tag!


I left space for a mirror in the center of the wardrobe above my “jewelry box” section. I purchased a simple round mirror, and to add even more detail, I attached decorative wood appliqués from Amazon. To keep the gold elements of the room cohesive, I spray painted the mirror the same color as the chandelier and vanity mirror (more on that later!)


Mirror — Spray Paint — Appliques
The Vanity: A Custom Glam Station Made Just for Me
No cloffice is complete without the perfect vanity, and I knew exactly what I wanted—functional storage, a luxe countertop, and a statement mirror to tie it all together. I had my vanity built with three drawers on each side, keeping the bottom two deeper for bulkier items like hot tools and makeup bags. In the center, I added a long, skinny drawer the same size as the top side drawers, designed specifically to hold all my everyday makeup essentials—because easy access is key!

For the countertop, I went to a local stone shop and simply told them, “I want a light quartz with bone/taupe veining.” They came back with Brunello quartz, and it was love at first sight—the perfect soft, elegant look to complement the space.

To finish it off, I carefully picked out the perfect drawer pulls to bring the whole design together.

Drawer Pulls
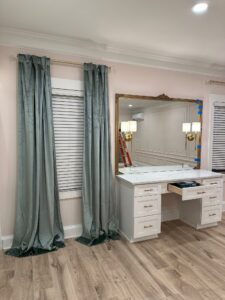
Next, I had my heart set on a grand, ornate gold mirror to go above the vanity. But as it turns out, finding exactly what I envisioned was way harder than expected. Unless I wanted to blow my budget on a single mirror. After endless searching, I decided to DIY my dream mirror instead! I bought a standard builder-grade mirror in the exact size I needed, then trimmed it out with a beautiful ornate molding. To add even more detail, I attached decorative wood appliqués from Amazon—the same ones I used to elevate the round wardrobe mirror—and painted the whole thing gold for that perfect vintage-inspired touch.
The final cherry on top? The sconces I mentioned earlier were installed directly onto the mirror, giving it a super custom, high-end feel. Now, my vanity is everything I dreamed of—functional, elegant, and made just for me!


Mirror — Drawer Pulls — Sconces — Molding — Wood Appliques — Paint
Furnishings, Décor & Final Touches: Bringing the Glam to Life
With the major renovations complete, it was time for my favorite part—furnishing and decorating the space to bring my soft glam vision to life!
I started with the door hardware, swapping out standard doorknobs for gold crystal knobs that added just the right amount of elegance and sparkle.


Door Knobs
I added light green velvet curtains hung on gold curtain rods—which I spray-painted myself to match the other gold accents throughout the space. The soft green hue was a deliberate choice, bringing in a rich contrast against the pink, neutral, and gold tones that dominate the room.

Curtain Rods — Curtains
For furnishings, I curated pieces that felt both functional and luxe—Anchoring the space is my gold bookshelf with glass shelves, a perfect mix of chic and practical. It holds a curated selection of books and decorative objects, but also seamlessly integrates office essentials like my printer and supplies—proof that beauty and efficiency can coexist.

Bookshelf
For my glam station, I chose a neutral chic vanity chair, ensuring comfort without sacrificing style. The countertop decor was all about elevating everyday moments: a luxe gold tissue box holder adds a touch of elegance, while a decorative perfume tray organizes my favorite scents in a way that feels both effortless and refined.

Tissue Box — Vase

Tray — Mirror
To keep everything beautifully organized, I added sunglass and headband holders to the wardrobe shelves, making sure all my accessories were displayed in a stylish yet accessible way.

Headband Holder — Sunglass Holder
On the wardobe wall above my jewelry storage, I added another decorative tray to hold my current favorite perfume (which is constantly changing), and other decorative items to fill the space.

Decorative Tray
On the floor, I layered in warmth and personality. A 9×12 Ruggable rug in Maral Heriz Creme stretches across the space, making it feel cohesive and polished.

Rug
In front of the bookshelf, a 2×3 leopard rug adds an unexpected yet perfectly bold moment. Keeping with that bold touch, I also included a leopard accent chair, adding both texture and a bit of attitude to the mix.
But the undeniable star of the room? My Anthropologie Gleaming Primrose mirror. It was my biggest splurge and the ultimate focal point, bringing drama, elegance, and a sense of grandeur to the space. To offset the investment, I DIYed and saved on my other two mirrors, proving that a well-placed splurge can be totally worth it.


Leopard Rug — Mirror
Balancing beauty with function, I incorporated two desks—one for my assistant and one for myself—creating an inspiring workspace without compromising on style. Of course, our desk tops had to include functional but stylish accessories.
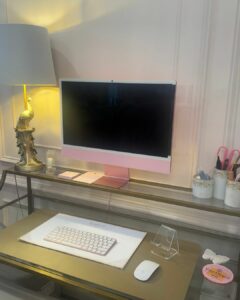
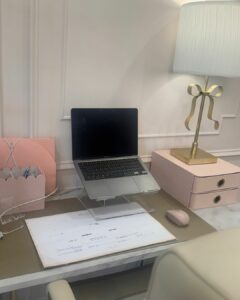


Desk — Chairs — Desk Mats
Every detail in this space was chosen with intention, blending glamour with functionality to create a cloffice that is both inspiring and uniquely me.
Final Thoughts: My Finished Cloffice Headquarters
This cloffice started as just an idea—a dream of creating a space that was equal parts glam, functional, and inspiring—and now, it’s everything I envisioned and more. After a lot of hard work on Everyday is Darling and reaching so many milestones that I’m incredibly proud of, creating this space was a moment where I could physically see everything I’ve accomplished. It was more than just a renovation—it was a big and important milestone in itself, a reflection of how far I’ve come. Now, whether I’m working, creating content, or indulging in a little glam time at my vanity, I get to do it in a space that truly inspires me every day. If you’re dreaming of your own functional yet fabulous space, let this be your sign to go for it—because when style and function come together just right, it’s pure magic.
One final reminder of the before—
And the after—

Click the photo below to shop the entire post!